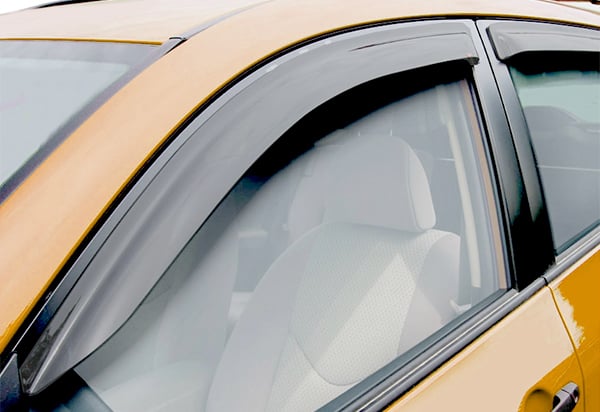
 Window Deflectors do a wonderful job of keeping wind and weather out of your vehicle's cab while still letting in fresh air. They hang out far enough to allow you to lower your windows an inch or two without disturbing your passengers with howling, whistling wind or splashing precipitation. Never underestimate the rejuvenative power of fresh air. It feels good, sure, but it can also keep you awake and alert on a long drive.
To look at your average Window Deflector, you would think installation were a breeze. That's not exactly true. While a WeatherTech deflector isn't the most difficult thing in the world to install, and neither are those by Stampede or Putco, installing a deflector properly is also not the easiest. There are two specific processes by which Window Deflectors are installed: either via adhesive backing tape, or by bending and snapping the device into the window channel.
Adhesive Window Deflector Installation
- Remove your deflectors from the box. Check that all deflectors and other necessary materials are present.
Helpful Tip: To avoid smudging your window deflectors before attaching them, it's a good idea to use latex or cloth gloves when installing them, remembering only to handle them by the outside edges, never the clear plastic itself.
- Use Automotive Surface Cleaner (which should be included...if it is not, any multipurpose surface cleaner will do) to wipe down the area to which tape will be applied. Dirt or dust left disregarded can weaken adhesive and shorten your deflectors' life span.
- When surface dries (which shouldn't take long), take out deflectors, turn over, and remove the non-adhesive strip to expose adhesive. Be very careful not to touch the adhesive before applying it.
- Carefully following the instructions, place the deflectors atop your windows exactly as the instructions say. These will be cut specifically to your vehicle, so they should follow your window's contours perfectly.
- Depress the corners first and work your way up the length of each deflector, depressing as you go, to glue them into place above your window.
- Stand back and marvel at the job you've done so well.
In-Channel Window Deflector Installation
- Carefully remove your deflectors from the box in which they were shipped and lay them out.
- Roll down every window into which you intend to place a deflector.
- One by one, remove each individual reflector from its protective plastic bag.
- You will notice a lip on one side of your deflector. This is intended to fit inside your window channel. Delicately bend your deflector so that you can fit it inside your open window. Ease the deflector in-line with the upper portion of the window channel.
- Being careful not to apply too much force but strong enough to make it fit, wedge the upper lip of your deflector into the window channel. When the entire length of the deflector is within the channel, let go. These deflectors are designed to expand into the channel when you do so, locking into place by virtue of attempting to regain their prior shape.
- Stand back and marvel at the job you've done so well.
Conclusion
![]() Window Deflectors provide drivers with the opportunity to breathe some fresh air even on the worst days without letting in a howling breeze or rain and snow. Installing these accessories is relatively simple, but don't take the process for granted. If you have any further questions regarding Window Deflector installation, please feel free to contact our dedicated and helpful Customer Service staff by calling 800-663-1570. Also, if you are in the market for new window deflectors, be sure to review our Top 10 Best Window Deflectors article.
Window Deflectors provide drivers with the opportunity to breathe some fresh air even on the worst days without letting in a howling breeze or rain and snow. Installing these accessories is relatively simple, but don't take the process for granted. If you have any further questions regarding Window Deflector installation, please feel free to contact our dedicated and helpful Customer Service staff by calling 800-663-1570. Also, if you are in the market for new window deflectors, be sure to review our Top 10 Best Window Deflectors article.


